
Why Millimeters in Cockpit Geometry Decide Lap Times and Survival
When the lights go green, a driver needs a wide, stable view of the corner, not a fight with safety equipment. The common myth is that a frontal head restraint, often called an FHR or HANS device, restricts movement and blocks situational awareness. In a correctly fitted cockpit, the opposite is usually true. The restraint limits dangerous forward head movement during a crash while still allowing the controlled rotation needed to scan mirrors, identify traffic, and find a late apex.
The stakes are measured in milliseconds and millimeters. During a severe deceleration, the torso is held by the harness while the head continues forward because of inertia. Without an effective restraint system, the neck can experience extreme tension, compression, and bending loads, contributing to catastrophic injuries such as basilar skull fractures. A properly matched seat, harness, helmet, tether, and FHR spreads the load through the shoulders and torso, reducing neck stress. The goal is not to immobilize the driver. It is to create a controlled safety envelope that preserves vision, comfort, and precise car control.
Matching Recline Angles to Device Collar Profiles
Start with the seat, because every other measurement follows the driver”s posture. Production-based race cars often retain a relatively upright seating position, while purpose-built racers may place the driver at a 20 to 30 degree recline to package the roll cage, lower the center of gravity, or improve pedal alignment. A seat recline between roughly 10 and 30 degrees can work effectively, but the FHR collar must sit flat and stable across the shoulders at that angle.
The biomechanical mismatch appears when a laid-back shell is paired with a device designed for an upright torso. The collar can tilt upward at the front, press into the helmet, or create a gap beneath the shoulder belts. That gap encourages helmet push, upper-spine fatigue, and inconsistent belt loading. Before chasing a faster lap, sit fully buckled in complete gear and check whether the collar follows the chest and shoulder line without forcing the chin upward.
When optimizing cockpit ergonomics, pairing your seat posture with the right frontal head restraint prevents helmet push and upper spine fatigue. Traditional yoke-style HANS devices rest on the shoulders and rely heavily on the harness to hold the collar down. Hybrid platforms use additional torso or chest straps and can suit drivers who need more freedom with standard three-point belts or different seat geometries. Neither design is automatically better. The correct choice depends on the sanctioning body, seat shape, belt routing, helmet anchors, and the driver”s measured position.
- Measure the actual torso angle with the driver seated, not the nominal seat-back angle.
- Confirm the collar sits evenly on both shoulders and does not contact the helmet during normal scanning.
- Check that the device is approved for the event and compatible with the helmet anchor system.
- Use only manufacturer-approved padding and adjustment parts. Never modify the structural body of an FHR.
Critical Shoulder Belt Angles and Roll Bar Geometry
Shoulder belts are the bridge between the driver, the FHR, and the car”s safety cell. For many HANS-style systems, the belts should run from the shoulder crown toward the harness bar at approximately 10 to 20 degrees below horizontal. In practical terms, the belt line should be level with, or slightly lower than, the shoulders. A belt that angles sharply downward can load the spine and pull the restraint into an undesirable position during impact.
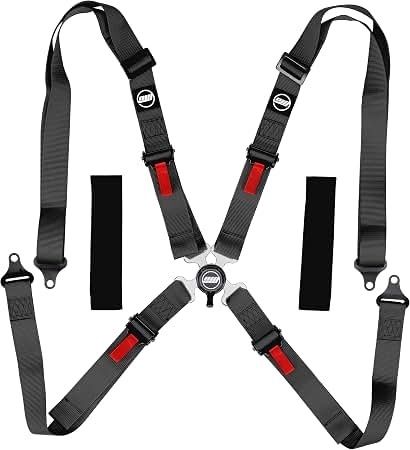
The harness bar must also be aligned with the seat and shoulder height. Exact rules vary by harness and governing body, so the installation manual and technical regulations take priority over generic garage advice. The bar should not sit so high that the belts angle upward over the shoulders, and it should not sit so low that the belts create excessive downward force. A professional inspection is especially valuable when the bar is part of a roll cage, because tube placement, seat-back clearance, and anchorage strength all matter.
Two-inch and three-inch webbing behave differently around an FHR collar. Three-inch belts provide a broad load surface and are common in many racing harnesses, but they can be less tolerant of tight collar contours or awkward belt spacing. Two-inch FHR-specific shoulder belts often sit more cleanly on the device and reduce the chance of belt interference. The belt edges should remain flat, separated, and close to the driver without riding onto the neck. Following precise harness geometry ensures the belt stays anchored flat across the composite collar during violent multi-axis forces.
| Geometry check | What to verify | Why it matters |
|---|---|---|
| Shoulder belt angle | Approximately 10 to 20 degrees below horizontal for compatible HANS installations | Helps keep the FHR seated and limits harmful spinal loading |
| Belt spacing | Belts lie flat, remain separated, and do not press into the neck | Prevents belt slip and concentrates load on the intended surfaces |
| Harness bar height | Aligned with the shoulder line and approved installation range | Controls the direction of force during frontal and angled impacts |
| Webbing width | 2-inch or 3-inch belts selected for the device and regulations | Improves collar fit and reduces interference |
Tether Slack Calibration for Unrestricted Vision and Apex Hunting
Tether adjustment is where safety and vision meet. Too much slack can allow excessive forward head excursion, meaning the head travels farther before the restraint engages. Too little slack can make the driver feel locked in, restrict the chin-to-chest movement needed for a safe exit, and interfere with mirror checks. The correct setting allows normal scanning while keeping forward movement within the manufacturer”s specified limit.
Sliding tether systems can provide a more natural lateral sweep than fixed anchors, particularly in cars with wide mirrors or multiple blind spots. Fixed systems may feel more direct and simple, but they can expose poor alignment if the helmet anchor, seat centerline, and device are not positioned together. Tethers are not universal components. Helmet posts, quick-release fittings, tether length, and anchor orientation must match the approved system.
Use this paddock test before the first session, after any seat adjustment, and whenever a different helmet or device is used:
- Sit in the car wearing the complete race outfit, helmet, FHR, gloves, and harness. Tighten the lap, shoulder, and anti-submarine belts exactly as they will be used on track.
- Rotate the head left and right to check both mirrors, the side window, and the expected apex sightlines. The chin should not be forced upward or pulled into the chest.
- Lean forward naturally and confirm that the tether engages before excessive excursion. Follow the device manual”s limit; some Hybrid instructions specify no more than 2.25 inches of straight-forward head movement.
- Move the head through the full practical range, then inspect the tether path for rubbing, kinks, crossed legs, or contact with the helmet edge.
- With a crew member holding the car stationary, test the quick-release mechanism and practice exiting. The system must release cleanly without forcing the driver to fight the tether.
- Recheck every anchor, post, and adjustment screw for correct seating and manufacturer-specified torque. Do not substitute generic screws or hardware.
The rear tether is often adjusted first because it establishes the primary relationship between the helmet and restraint. Front tether settings then follow the helmet anchor position. Make small changes, repeat the visual scan, and record the final setting. A driver who can identify a closing car, late apex, or flag station without lifting the shoulders is gaining both safety and lap-time consistency.
System Maintenance and Certification Health Check
Certification is not a permanent substitute for inspection. FIA 8858-2010 devices should be checked for the correct labels, compatible helmet anchors, and tether identification. The device itself may not carry the same expiration concept as a tether, but tethers typically require replacement on a defined schedule. SFI 38.1 certification generally operates on a five-year recertification cycle, although the exact requirement depends on the manufacturer and sanctioning body. Always verify the current rulebook, because event officials may apply stricter deadlines.
Any significant impact changes the inspection standard. A device involved in a crash should be removed from service until the manufacturer or qualified technician assesses it. Look for cracks, delamination, exposed composite, distorted hardware, damaged tether stitching, fraying, or missing labels. Harnesses also require replacement after serious loading, contamination, or deterioration. A clean-looking belt can still have compromised fibers after an impact.
- Clean gel pads and fabric with mild soap and warm water, then allow them to dry completely.
- Keep composite shells and tether assemblies away from ultraviolet light, petroleum products, corrosive chemicals, and extreme heat.
- Store the system in a dry, protected bag rather than loose on the garage floor or inside a hot trailer.
- Inspect helmet posts, quick-release fittings, tether stitching, belt edges, and adjustment hardware before every event.
- Record manufacture dates, recertification dates, and crash history so replacement decisions are not left to memory.
Take the Grid with Absolute Confidence in Your Safety Envelope
Geometry turns safety equipment into a performance asset. A seat recline that matches the FHR collar, shoulder belts that load the device correctly, and tethers calibrated for useful movement can reduce neck strain while preserving the visual information needed to attack a corner. The result is a calmer upper body, cleaner steering inputs, and less fatigue late in a session.
There is no real trade-off between neck protection, cockpit comfort, and hot-lap aggression when the system is fitted as one integrated package. Before the next green flag, run the final pit-lane routine: confirm the helmet anchors, seat position, belt seating, harness tension, tether clearance, quick-release function, and mirror visibility. If the driver can breathe comfortably, scan freely, exit quickly, and remain securely supported, the safety envelope is doing its job. That is the preparation that lets talent take the checkered flag with confidence.